Postman Collection
Now you can start testing our API before you write a single line of code, using our Postman Collection. It’s a great way to get familiar with the available endpoints, requests, and responses.
What’s Postman?
Postman is a very powerful application meant to help with API development. You can download it here.
To get started just click the button and make sure you install the application.
Importing the Postman collection
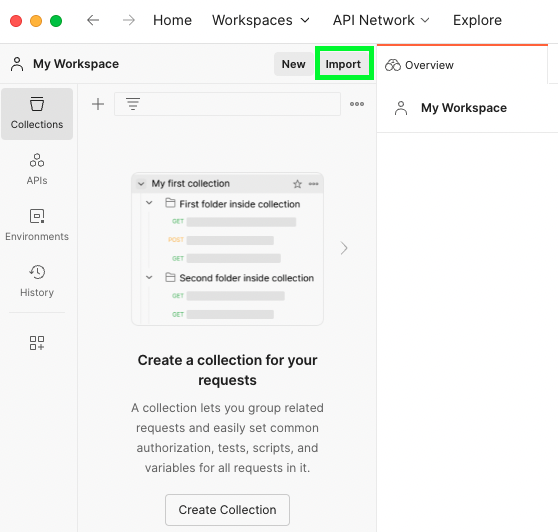
To import the collection from the previous sub-section into Postman simply select the “Import” button at the top of Postman, as shown in the following picture.
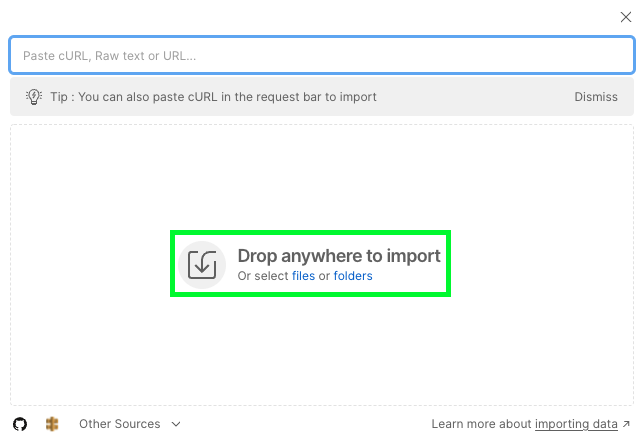
A new pop-up will appear and the postman collection can be dragged and dropped into it or selected through the option “files”.
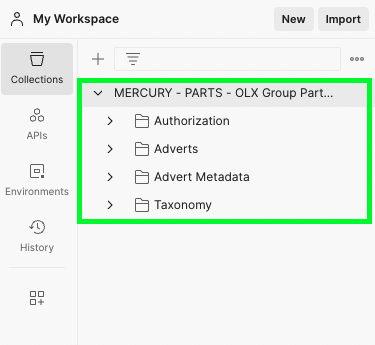
Postman will then load the collection and show it in the “Collections” tab.
Configuring your environment
If you opened Postman you should now have the OLX Group API collection there. However, it won’t work properly until you configure a few environment variables.
On the top right corner click the settings icon:
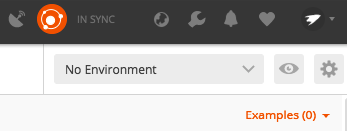
On the next screen click the Add button at the bottom and fill in the following info replacing <YOUR API KEY> and <YOUR CLIENT CREDENTIALS> with your own:
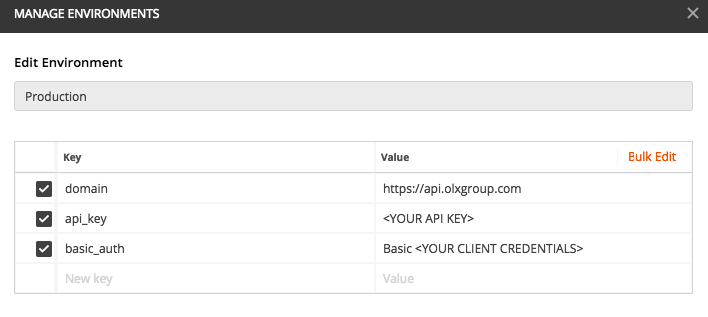
Remember that your client credentials (that will go into the Authorization header in certain requests) should be a Base64 Encode/Decode string (in UTF-8 encoding) consisting of a concatenation of your client ID and Secret separated by a colon with the word “Basic” in front of it.
Making requests with Postman
You should be ready to start making requests now. This Postman collection makes use of a few tricks to make your life easier. Certain requests will automatically set environment variables that are then used in subsequent requests. You can identify these variables by looking for values between double curly braces, such as ``.
As explained earlier in these docs, in order to execute actions on behalf of application users, you need an access token. So, provided that you have:
- An application with a Client ID, Client Secret and API Key
- An active test account on the Portal you want to integrate with a paid package that allows publication of ads
Then you can start by getting an authorization code by manually visiting this URL, logging in to the Portal, and authorizing your app:
https://<OUR PORTAL SITE>/mercury/authorization/?response_type=code&client_id=<YOUR CLIENT ID>&state=<A USER ID>
To learn more about each parameter, see Authorization flow .
After doing all that you’ll be redirected to your Authorization Callback URL. Now you have to copy the authorization code from that URL, go back to Postman, open the “Request Access Token” request, and replace the code in the body:
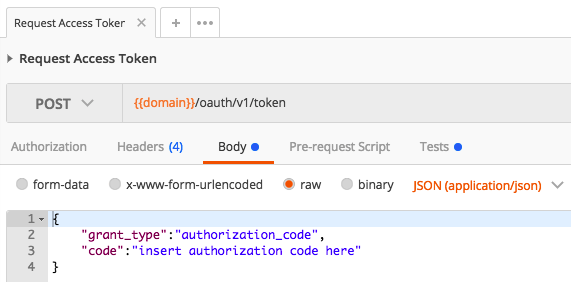
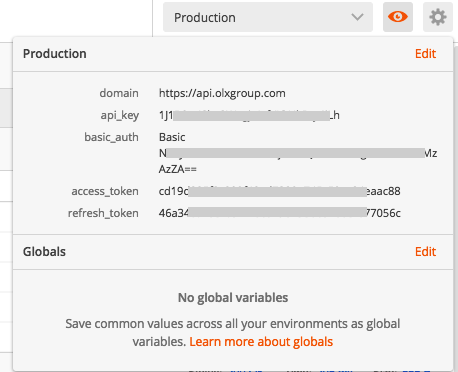
After sending this request you’ll get your access and refresh tokens and they’ll be automatically set as environment variables so that you don’t have to type them over and over again. If your access token expires and you need a new one, just open the “Refresh Token” request and hit “Send”. No need to type it anywhere because it’s already saved in your environment. You can check all active and available env vars on the eye icon on the top right corner:
Posting ads
To post an ad just open the “Create an Advert” request and hit send. The sample ad should be posted in your account just fine. If you haven’t set up a callback URL in Setup notifications in your application then you need to manually get the status of your operation.
After posting the ad, the advert_uuid is automatically saved in an environment variable. This variable will always hold the last advert_uuid that you created. To check its status simply open the “Get Advert Status” request and hit send.
There are a few other endpoints available for you to test. We’ll be updating this regularly so make sure you come back to check the latest version.